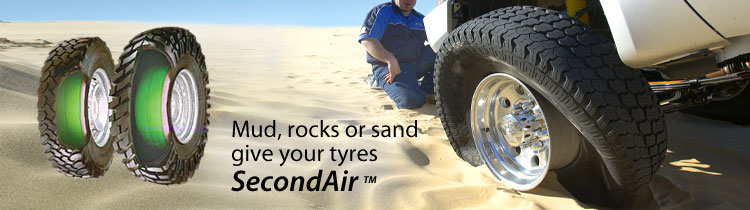
How It Works
 Mounting Instructions
The only modification required is the drilling of an additional hole in the rim. The system will fit one piece steel and alloy rims.
SecondAir Preparation Helpful Hints
The extra 8mm (5/16th) hole, for the beadlock tube valve should be drilled between 150-200mm. on one side of the original value hole. Drill the hole inboard as far as practicable, this will depend on your wheel offset.
Flatter areas of your wheel rim are the best place for drilling your second valve hole, tight radius curves should be avoided. Make sure the hole is smooth and free of burrs.
Clean the rims sealing edges (where the tyre bead contacts the rim) with a wire brush to remove dirt and flaking paint etc. Check inside the tyre and the outer part of the bead for any foreign body that could cause problems for the tube or sealing of the tyre bead.
SecondAir Mounting Instructions
- Fit the special valve to the original valve hole with the slot parallel with rim edge and tighten.
- Mount the inner tyre bead to the wheel rim.
- Dust the tube and the inside of the SecondAir casing with the powder supplied.
- Mount the inner side of the SecondAir casing making sure the side with 2 black tabs (air channel) is facing out. DO NOT use tyre levers etc. Position the 2 black tabs near the special valve.
- Fit the tube inside the SecondAir casing with the valve in the new drilled hole and secure with the brass nut.
- Fit the outer bead of the SecondAir casing over the rim. Make sure the 2 black tabs are positioned on either side of the special valve. The tabs and fabric flap need to be folded inwards under the bead of the casing between the rim and the tube. Ensure the tube is completely tucked in and not showing near the SecondAir bead.
- Tighten tube valve brass nut ensuring O-ring is central and covered by concave washer. If O-ring is forced out when tightening, loosen nut, pull valve in direction of area where O-ring was showing and re-tighten.
- Inflate the tube (approx 2 psi (14 kpa)), look inside the tyre and check with your hand that the SecondAir casing is even and centrally located and the tube is not visible.
- Let the air out, mount the remaining bead of the tyre. Some rims with no or very little offset may require the valve of the tube to be attached to a valve tool to allow the valve to be pushed inside the rim which allows easier fitting and seating of the outer tyre bead. Once fitted correctly pull valve out and screw brass nut, washer and O-ring into place. Depress tyre bead near special valve to ensure the 2 black tabs are inside the tyre and not caught between edge of rim and bead.
- Inflate to 12-18 psi (83-124 kpa) the SecondAir to assist in seating the tyre beads. (Remember Brass valve stem is the Beadlock)
- Inflate the tyre via the special valve to 12-18 psi (83-124 kpa).
- Inflate the SecondAir to 2 psi (14 kpa) above the normal road pressure or a minimum of 45 psi. (275 kpa.) e.g. normal road pressure 475 psi (309 kpa) Beadlock pressure 49 psi (323 kpa)
- Inflate the tyre to normal road pressure.
- Check for leaks.

Recommendations
- For normal on-road driving keep SecondAir beadlock at 2 psi (14 kpa) above the tyres normal pressure.
- For off-road use lower the tyre to the desired pressure. Always maintain the SecondAir at the normal on-road pressure.
- Never lower SecondAir pressure below 45 psi (275 kpa).
In conclusion
With SecondAir properly installed you will have many years of trouble free 4 wheel driving enabling you to travel with confidence knowing your tyres are firmly beadlocked to your rims.
The tyres real potential will have been realized by increasing the tyres footprint 20-55%.
Caution
Beadlock Australia P/L cannot be held liable for SecondAir units being incorrectly installed and/or misused in a manner they were not intended. Vehicles driven with low tyre pressure can be less predictable in their on/offroad handling, drive accordingly.